Building Your First GraphQL API Using StepZen

 Brian Rinaldi
One of the problems facing developers today is that we are getting data from a disparate variety of sources. One application may get data from a variety of internal RESTful APIs, internal databases and even third-party APIs and services. It is rare that all these pieces know about each other - even across internal APIs - so it falls upon the developer to write complex and often fragile code to bring all these systems together.
StepZen offers a platform that solves these problems by enabling developers to bring all the pieces of their backend together into a single API enabled via GraphQL. Curious? In this tutorial, we'll walk through the steps to building your first GraphQL API using StepZen. In this case, we'll use a MySQL backend, but be aware that StepZen supports multiple backend connectors.
Before we can get started, the first thing you'll need to do, of course, is get access to the StepZen private alpha. It is free to use and we'll work to get you access quickly. Once you have access, there is a ton of documentation available to learn how the system works, but we'll walk through the key steps here.
What We'll Build
We're going to build a very simple GraphQL API with critically important data about Scooby Doo characters and episodes. A GraphQL API is based around types, and our API will consist of two types: character and episode. For the sake of example, these are very simple (as we'll see in a moment).
The actual data will come from a MySQL database. I am hosting my MySQL database via Heroku, but where you choose to host the database isn't important provided that it is accessible by StepZen's service (if you'd like to use Heroku, the steps to do this are available in the StepZen documentation)).
Creating the Database
Let's create our MySQL data by creating the two very simple tables and populating them with a little bit of data.
CREATE TABLE `characters` (
  `id` int(11) NOT NULL AUTO_INCREMENT,
  `name` varchar(45) NOT NULL,
  `isMonster` tinyint(4) DEFAULT '0',
  `episodeID` int(11) DEFAULT NULL,
  PRIMARY KEY (`ID`),
  UNIQUE KEY `ID_UNIQUE` (`ID`)
);

CREATE TABLE `episodes` (
  `id` int(11) NOT NULL,
  `name` varchar(45) NOT NULL,
  `originalAirDate` date NOT NULL,
  PRIMARY KEY (`ID`),
  UNIQUE KEY `ID_UNIQUE` (`ID`)
);

INSERT INTO `characters` VALUES (1,'Scooby Doo',0,0),(2,'Daphne Blake',0,0),(3,'Shaggy Rogers',0,0),(4,'Fred Jones',0,0),(5,'Velma Dinkley',0,0),(6,'Black Knight',1,1),(7,'Ghost of Captain Cutler',1,2),(8,'Phantom',1,3),(9,'Miner Forty-Niner',1,4);

INSERT INTO `episodes` VALUES (1,'What a Night for a Knight','1969-09-13'),(2,'A Clue for Scooby Doo','1969-09-20'),(3,'Hassle in the Castle','1969-09-27'),(4,'Mine Your Own Business','1969-10-04');
Ok. Now that we have our data, we can move on to the fun part - building the API.
Getting Set Up With StepZen
Once you have your private alpha account on StepZen, the first thing you'll want to do is install the StepZen CLI.
npm install -g stepzen
Next, we'll need to connect the CLI to your StepZen account. The details you need can be found on the StepZen dashboard. You'll need both the account name and the admin key. Run the following, replacing [account name] with the account from your account.
stepzen login -a [account name]
You'll then be prompted to enter your admin key. Don't worry, you'll only have to do this once.
Creating the API
Let's start by creating a new project folder for our Scooby Doo API.
mkdir scooby-api
cd scooby-api
Next, we'll create the files for our GraphQL types: Character and Episode. These are written using standard GraphQL SDL (Schema Definition Language) that StepZen uses these to generate your full GraphQL schema. Before I start writing code, there are some key concepts to understand when building your API with StepZen:
- The fields and their associated types are written as a GraphQL interface. This is done so that you can have multiple implementations of a type in cases where the data may be supplied by multiple different backends. For example, a shipping type that uses both a FedEx and a UPS data source.
- A type is a concrete implementation of an interface and is typically used to define how the the connection to a backend where data is retrieved.
There's more to it than that, which you can read about in the docs, but, for now, let's get to writing some code. First, let's create a file to define the interface and queries for our Character type in a file named character.graphql:
interface Character {
  id: ID!
  name: String!
  isMonster: Boolean!
  episodeID: ID!
}

type Query {
  character(id: ID!): Character
  characters(isMonster: Boolean!): [Character]
}
Our character type has four fields. We've also defined two queries. One will get a single character based upon an ID and the other will get a list of characters based upon whether that character is a monster or not. Let's create a similar file called episode.graphql for our Episode type:
interface Episode {
  id: ID!
  name: String!
  originalAirDate: Date!
}
type Query {
  episode(id: ID!): Episode
}
In this case, we have just three fields and only a single query defined to get an episode by its ID.
Tying The Schema Together
We need one more file in order to tie the different files in our schema together for StepZen: index.graphql. It lists all the files in the schema that StepZen will use to assemble the GraphQL API. In this case, we only have two - character.graphql and episode.graphql - so our index.graphql will look like the following:
schema @sdl(files: ["character.graphql", "episode.graphql"]) {
  query: Query
}
We're ready to upload our schema to StepZen. From the command line, be sure you are in your project's root folder and run:
stepzen upload schema scoobyapi/schema --dir=.
This will push the code to StepZen and perform some validation on it. The scoobyapi/schema represents the folder name and schema name for this schema. I can use whatever I want here, but it is important to note that whetever value I place here will be needed in later commands (also note that the folders are scoped to your user account, so you don't need to worry about name conflicts with other users). You can specify a different directory than the one you are in by changing the --dir flag.
You should get a resonse like the following:
Uploading...
Successfully uploaded the schema
Ok. Let's go ahead and deploy this to StepZen. You'll want to deploy this to the same folder (i.e. scoobyapi) as the schema, though you can name it whatever like (I used scoobydoo). Supply the schema folder and name from the upload (scoobyapi/schema).
stepzen deploy scoobyapi/scoobydoo --schema=scoobyapi/schema
You should receive a response like the following, though your endpoint will be different:
Deploying...
Redeployment successful!
Your endpoint can be found at: https://biggs.stepzen.net/scoobyapi/scoobydoo/__graphql
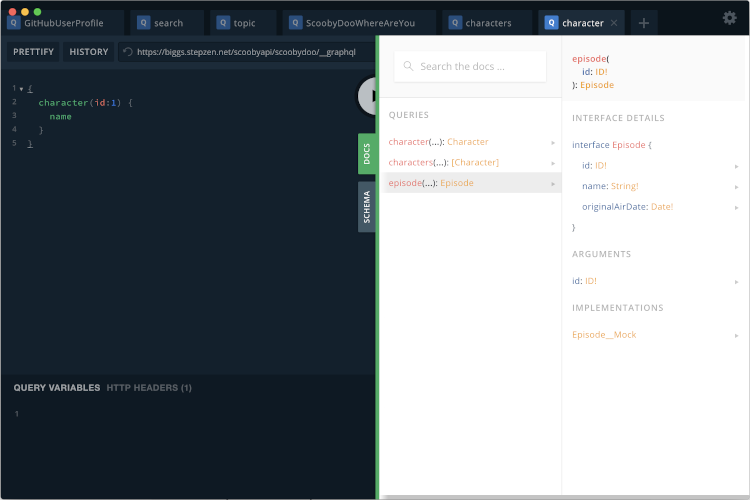
Using a tool like GraphQL Playground, we can now inspect our API using the URL provided. Open GraphQL Playground and enter the URL. You'll need to click HTTP Headers and provide the API Key from your dashboard page as an authorization header in the following format:
{
    "Authorization": "Apikey MYAPIKEY"
}
Now, if you click on docs, you should see the types associated with your new API.
However, if you try to run a query like:
{
  character(id:1) {
    name
  }
}
...you'll get a null response:
{
  "data": {
    "character": null
  }
}
This is because we haven't told our API where to get the data from yet. Let's do that.
Connecting Mock Data
Connecting our API to mock data is as simple as adding a custom @mock GraphQL directive to our interfaces. For example, here is our updated character.graphql:
interface Character @mock {
  id: ID!
  name: String!
  isMonster: Boolean!
  episodeID: ID!
}

type Query {
  character(id: ID!): Character
  characters(isMonster: Boolean!): [Character]
}
Let's also add the same @mock directive to our episode.graphql and then upload and deploy:
stepzen upload schema scoobyapi/schema --dir=. &&
stepzen deploy scoobyapi/scoobydoo --schema=scoobyapi/schema
Now if we run the same query from earlier, we'll get mock data in the result:
{
  "data": {
    "character": {
      "name": "In vel mi sit amet augue congue elementum"
    }
  }
}
Connecting MySQL
Ok, mock data is great - and easy - but let's populate our API with some real data!
Creating a Configuration
The first step to connecting a custom backend is to create our own configuration set to supply to StepZen that contains the connection information needed to connect to the MySQL database. Create a file called config.yaml within your project directory. You'll need your MySQL database username, password, hostname and database name. Assuming you have all that information handy, create a MySQL configuration in the following format (replacing the values in the dsn for your connection information):
configurationset:
  - configuration:
      name: MySQL_config
      dsn: username:password@tcp(hostname)/databasename
Next you'll need to upload this configuration to StepZen. The best practice would be to place it in the same folder as the schema. You can name it whatever you like (I named mine just config). Keep this folder and name handy though as you'll need them again when we deploy.
stepzen upload configurationset scoobyapi/config --file=./config.yaml
You should receive a response like the following:
Uploading...
Successfully uploaded the configurationset
Now that StepZen knows how to connect to our database, we can modify the types to implement that backend.
Creating Concrete Types
First of all, let's remove the @mock directive from each type as we're now going to populate it with real data. Next, we need to implement each interface as a concrete type to connect the backend. We can do this in separate files, but our types are simple enough here that, to keep things easy, we'll just add this to the current character.graphql and episode.graphql.
Let's look at the Episode type first. First we need to create the concrete implementation. In this case, though we can leave it empty as to will only contain the same fields contained within the interface. I've named mine EpisodeBackend but you can name it whatever you like.
interface Episode {
  id: ID!
  name: String!
  originalAirDate: Date!
}
type EpisodeBackend implements Episode {}
type Query {
  episode(id: ID!): Episode
}
Now that we have the concrete implementation, we can implement the query and connect it to MySQL. Here's the full complete code
interface Episode {
  id: ID!
  name: String!
  originalAirDate: Date!
}
type EpisodeBackend implements Episode {}
type Query {
  episode(id: ID!): Episode
  episodeFromBackend(id: ID!): EpisodeBackend
    @supplies(query: "episode")
    @dbquery(type: "mysql", table: "episodes", configuration: "MySQL_config")
}
Let's break down the query (episodeFromBackend) piece by piece so that it makes sense:
episodeFromBackendwill supply data to ourepisodequery and, as such, has the same arguments as that query. However, the query returns an instance ofEpisodeBakend(our concrete implementation) rather thanEpisode.- The
@suppliesdirective is what tells StepZen which query this will fulfill. In this case, we're specifying that this query is supplying data to theepisodequery (i.e. the query directly above it). - The
@dbquerydirective tells StepZen that this query will be fulfilled by a database query. We're supplying a type ofmysqlin order to use the MySQL connectors in StepZen and telling it to use the tableepisodesand the configurationMySQL_configthat we defined earlier in our configuration set. Since our table fields match the fields in our type, we don't need to supply anything else - StepZen is smart enough to figure out the proper query to construct to get the data.
Let's go ahead and upload and deploy these updates to our schema. Notice that our deploy command now specifies the configuration we uploaded earlier via the --condigurationsets flag.
stepzen upload schema scoobyapi/schema --dir=. &&
stepzen deploy scoobyapi/scoobydoo --schema=scoobyapi/schema --configurationsets=scoobyapi/config
Let's go ahead and test this out by running a query in GraphQL Playground:
{
  episode(id:1) {
    name
  }
}
This should return the real data we populated at the beginning of this tutorial:
{
  "data": {
    "episode": {
      "name": "What a Night for a Knight"
    }
  }
}
Let's do the same for the Character type, leaving out implementing the characters query for now:
interface Character {
  id: ID!
  name: String!
  isMonster: Boolean!
  episodeID: ID!
}
type CharacterBackend implements Character {}
type Query {
  character(id: ID!): Character
  characters(isMonster: Boolean!): [Character]
  characterFromBackend(id: ID!): CharacterBackend
    @supplies(query: "character")
    @dbquery(type: "mysql", table: "characters", configuration: "MySQL_config")
}
Upload and deploy it:
stepzen upload schema scoobyapi/schema --dir=. &&
stepzen deploy scoobyapi/scoobydoo --schema=scoobyapi/schema --configurationsets=scoobyapi/config
And finally, query it:
{
  character(id:1) {
    name
  }
}
The result should be:
{
  "data": {
    "character": {
      "name": "Scooby Doo"
    }
  }
}
Specifying a Custom Query
Our characters query allows us to get an array of characters by passing the isMonster query parameter. We'll need to supply the actual SQL query to StepZen so that it knows how to get the values. To do this, we pass a query parameter to the @dbquery directive rather than a table parameter as in the prior example. The ? in the query will be replaced by the value of isMonster being passed.
Let's take a look at our character.graphql with the finished charactersFromBackend query. This query supplies the characters query with data from MySQL:
interface Character {
  id: ID!
  name: String!
  isMonster: Boolean!
  episodeID: ID!
}
type CharacterBackend implements Character {}
type Query {
  character(id: ID!): Character
  characters(isMonster: Boolean!): [Character]
  characterFromBackend(id: ID!): CharacterBackend
    @supplies(query: "character")
    @dbquery(type: "mysql", table: "characters", configuration: "MySQL_config")
  charactersFromBackend(isMonster: Boolean!): [CharacterBackend]
    @supplies(query: "characters")
    @dbquery(
        type: "mysql",
        query: "SELECT * FROM characters WHERE isMonster = ?",
        configuration: "MySQL_config")
}
Now we can upload and deploy it:
stepzen upload schema scoobyapi/schema --dir=. &&
stepzen deploy scoobyapi/scoobydoo --schema=scoobyapi/schema --configurationsets=scoobyapi/config
Then let's try querying it:
{
  characters(isMonster:true) {
    name
  }
}
You should get the following response:
{
  "data": {
    "characters": [
      {
        "name": "Black Knight"
      },
      {
        "name": "Ghost of Captain Cutler"
      },
      {
        "name": "Phantom"
      },
      {
        "name": "Miner Forty-Niner"
      }
    ]
  }
}
Stitching Types Together
We have a schema with two types, character and episode, that pull real data from MySQL. However, they aren't tied together in any way. I cannot get the episode that a character was in right now without making two queries. This may be how it often works with REST-based APIs, but certainly not with GraphQL. Let's address that.
What we want is that when we get a character, it gives the associated episode that they appeared in. To do this, we're going to use another custom directive @materializer. Let's look at the finished character.graphql, then we'll cover the specifics of how it is configured. They key difference to notice below is the episode field within the Character interface.
interface Character {
  id: ID!
  name: String!
  isMonster: Boolean!
  episodeID: ID!
  episode: Episode
    @materializer(
      query: "episode"
      arguments: [{ name: "id", field: "episodeID" }]
    )
}
type CharacterBackend implements Character {
  id: ID!
  name: String!
  isMonster: Boolean!
}
type Query {
  character(id: ID!): Character
  characters(isMonster: Boolean!): [Character]
  characterFromBackend(id: ID!): CharacterBackend
    @supplies(query: "character")
    @dbquery(type: "mysql", table: "characters", configuration: "MySQL_config")
  charactersFromBackend(isMonster: Boolean!): [CharacterBackend]
    @supplies(query: "characters")
    @dbquery(
      type: "mysql"
      table: "characters"
      query: "SELECT * FROM characters WHERE isMonster = ?"
      configuration: "MySQL_config"
    )
}
We've created an episode field on our character that returns an instance of the Episode type. It uses the @materializer to call the query episode on the Episode type that we defined within our episode.graphql. The id argument that the query is looking for will be populated with the episodeID from the character.
Let's upload and deploy it.
stepzen upload schema scoobyapi/schema --dir=. &&
stepzen deploy scoobyapi/scoobydoo --schema=scoobyapi/schema --configurationsets=scoobyapi/config
And try querying it, asking for a list of characters who are monsters and the name of the episode that they appeared in:
{
  characters(isMonster:true) {
    name
    episode {
      name
    }
  }
}
Let's see the result:
{
  "data": {
    "characters": [
      {
        "episode": {
          "name": "What a Night for a Knight"
        },
        "name": "Black Knight"
      },
      {
        "episode": {
          "name": "A Clue for Scooby Doo"
        },
        "name": "Ghost of Captain Cutler"
      },
      {
        "episode": {
          "name": "Hassle in the Castle"
        },
        "name": "Phantom"
      },
      {
        "episode": {
          "name": "Mine Your Own Business"
        },
        "name": "Miner Forty-Niner"
      }
    ]
  }
}
Where To Go From Here
What we've touched on here really only gives you a taste of the real capabilities of StepZen. Imagine you're getting some of your backend data from MySQL and others from various RESTful APIs. StepZen would allow you to tie all those pieces together into a single API much the same way we tied our character and episode data together. This offers you a way not only to GraphQL-enable your existing backend, but to tie together disparate pieces into a single API accessible at a single endpoint. I hope you'll take some time to explore StepZen further via the documentation and share your thoughts and feedback with us.