Logging Event Listeners with GraphQL and React Hooks

 Samuel Hill
Hard; building an app that fits a user's wants and desires.
Harder; building an app and logging activity to understand all wants and desires of a user.
Lucky for developers, React Hooks is an effective way of handling state management and event listeners on a frontend. The event tracking lifecycle with React Hooks and GraphQL is comprised of two steps.
- Properly capturing DOM events to ensure a single, accurate event is logged.
- Asynchronously fetching an API without disrupting the DOM document event tracking.
You can find the code for this example in the StepZen GitHub repo.
Create React App
On your machine, run create-react-app and create a project called demo-event-tracking.
npx create-react-app demo-event-tracking
cd demo-event-tracking
npm start
Once running you should see the app running at localhost:3000.
Setting up Google Analytics
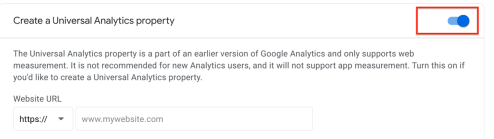
Let's create a Google Analytics account to track page activity for this react application. To properly track with the react-ga npm dependency, create a Universal Analytics Property for the react application. The react-ga dependency generates a site visitor clientId, which we will capture and pass into the GraphQL Mutation later on.
Install the react-ga dependency in the root of your React application with the following command:
npm install react-ga
Create an Amplitude Account
The next step is prepping a platform that you can send the click events to. You could use Google Analytics Event Measurements to track:
[eventCategory][eventAction][eventLabel][eventValue]
However, creating custom events in google analytics is complex and limited to these specific labels. To create custom event key-value with ease, I went with amplitude's API.
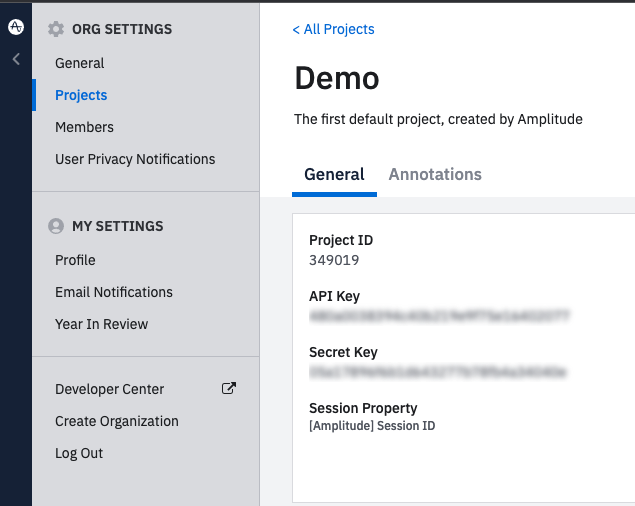
Sign up for a free account at Amplitude.com and go to account settings. Copy the api and secret key to reference later.
Create the StepZen Endpoint
Note: If you do not have a stepzen account, sign up for one now for free and follow the stepzen cli installation instructions to run the command below.
In the root of our project, run the following command. This will create a stepzen folder in a single command.
For Mac
mkdir stepzen; cd stepzen; touch index.graphql; touch amplitude.graphql; touch config.yaml
For Windows
mkdir stepzen; cd stepzen; type nul >> "index.graphql"; type nul >> "amplitude.graphql"; type nul >> "config.yaml"
Now in our code editor, open index.graphql and add the amplitude.graphql schema file to our @sdl schema index.
# index.graphql

schema
  @sdl(
    files: [
      "amplitude.graphql"
    ]
  ) {
  query: Query
}
In the amplitude.graphql file, copy the code below to properly write a event mutation to our amplitude account.
# amplitude.graphql

type Amplitude_Event {
  code: Int
  events_ingested: Int
  payload_size_bytes: Int
  server_upload_time: Int
}

type UserSearch {
  id: ID!
  lastUsed: String
  email: String
}

type Query {
  userSearch(email: String!): UserSearch
    @rest(
      setters: [
        { field: "email", path: "user_id" }
        { field: "id", path: "amplitude_id" }
        { field: "lastUsed", path: "last_seen" }
      ]
      resultroot: "matches[]"
      endpoint: "https://$apikey;:$secret;@amplitude.com/api/2/usersearch"
      configuration: "amplitude_config"
    )
}

type Mutation {
  amplitude_event(
    userId: String!
    eventType: String!
    eventTime: String!
    path: String!
  ): Amplitude_Event
    @rest(
      endpoint: "https://api2.amplitude.com/batch"
      postbody: "{\"api_key\":\"{{ .Get \"apikey\" }}\",\"events\":[{\"user_id\":\"{{ .Get \"userId\" }}\",\"event_type\":\"{{ .Get \"eventType\" }}\",\"event_properties\":{\"path\":\"{{ .Get \"path\" }}\"},\"event_time\":\"{{ .Get \"eventTime\" }}\"}]}"
      method: POST
      contenttype: "application/json"
      configuration: "amplitude_config"
    )
}
In this file, there is a configuration: "amplitude_config" that is sourcing from the config.yaml. Add the api and secret keys from the amplitude account settings into this yaml file.
# config.yaml

configurationset:
  - configuration:
      name: amplitude_config
      apikey:
      secret:
Now with our endpoint schema properly configured, run the following command to generate the GraphQL endpoint.
stepzen start --endpoint demo/events
A successful deploy will return a StepZen endpoint on your account that you can also explore from the StepZen dashboard. From the dashboard, test the mutation below to ensure the endpoint is sending the proper data to amplitude.
# amplitude.graphql

mutation MyMutation {
  amplitude_event(
    eventTime: "09/08/2014, 2:35:56 AM"
    eventType: "click"
    path: "app_header"
    userId: "1232342345"
  ) {
    code
    events_ingested
    payload_size_bytes
    server_upload_time
  }
}
If you can see an event has been sent to your amplitude account, the mutation ran successfully! Now we can set up the frontend to send this event on click in our application.
React App Event Tracking
In the root of your project, paste the newly generated endpoint into a .env file.
REACT_APP_ANALYTICS_STEPZEN_API_URL=https://youraccount.stepzen.net/demo/events/__graphql
REACT_APP_ANALYTICS_STEPZEN_API_KEY=
REACT_APP_REACTGA_ID=UA-XXXXX-X
This is also where you will provide your StepZen API key and google analytics universal code. With our environment configurations set up, the first step is to create the context of our analytics tracker.
Tracking Pageviews and Sessions with ClientId in Google Analytics
From the root of your project, run the following command.
For Mac
touch .env; mkdir src/contexts; cd src; cd contexts; touch analytics.js
For Windows
type nul >> ".env"; mkdir src/contexts; cd src; cd contexts; type nul >> "analytics.js"
Open the newly created analytics.js file and add the following code.
// src/contexts/analytics.js

import { createContext, useEffect, useState } from "react";
import ReactGA from "react-ga";

const analyticsContext = createContext();

const {
  REACT_APP_ANALYTICS_STEPZEN_API_URL,
  REACT_APP_ANALYTICS_STEPZEN_API_KEY,
  REACT_APP_REACTGA_ID,
} = process.env;

const url = window.location.pathname + window.location.search

const AnalyticsProvider = (props) => {
  const [userId, setUserID] = useState("unknown");
  useEffect(() => {
    ReactGA.initialize(`${REACT_APP_REACTGA_ID}`, { debug: true });
    ReactGA.ga((tracker) => {
      ReactGA.ga("set", "userId", "" + tracker.get("clientId"));
      setUserID(tracker.get("clientId"));
    });
    ReactGA.pageview(url);
  }, []);

  const state = {
    userId: userId
  }

  return (
    <analyticsContext.Provider value={state}>
      {props.children}
    </analyticsContext.Provider>
  );
};

export { analyticsContext, AnalyticsProvider };
Google Analytics is initialized in the useEffect React Hook. Once initialized, the userId is assigned to the clientId, and the pageview is captured from window.location.pathname + window.location.search.
useEffect(() => {
    ReactGA.initialize(`${REACT_APP_REACTGA_ID}`, { debug: true });
    ReactGA.ga((tracker) => {
      ReactGA.ga("set", "userId", "" + tracker.get("clientId"));
      setUserID(tracker.get("clientId"));
    });
    ReactGA.pageview(url);
  }, []);
The dependencies are react hooks, createContext, useEffect that you can read about more here, and react-ga for analytics in google.
import { createContext, useEffect, useState } from "react";
import ReactGA from "react-ga";
The analyticsContext is a wrapper around the application to initialize reactGA as a global element. This creates global variables for state management, similar to Redux but built into the react core.
const analyticsContext = createContext();
For context, you can pass any state object into child components. In this case, you can pass userId if you want to pass the clientId to any other components.
const state = {
    userId: userId
}
Pass the Context to the Index.js Root File
To create the wrapper, go to the index.js file and pass AnalyticsProvider into the render of our ReactDOM.
// src/index.js

import React from "react";
import ReactDOM from "react-dom";
import App from "./App";

import { AnalyticsProvider } from "./contexts/analytics";

ReactDOM.render(
  <React.StrictMode>
    <AnalyticsProvider>
      <App />
    </AnalyticsProvider>
  </React.StrictMode>,
  document.getElementById("root")
);
With AnalyticsProvider in the ReactDOM, we can track google analytics pageviews on each application render.
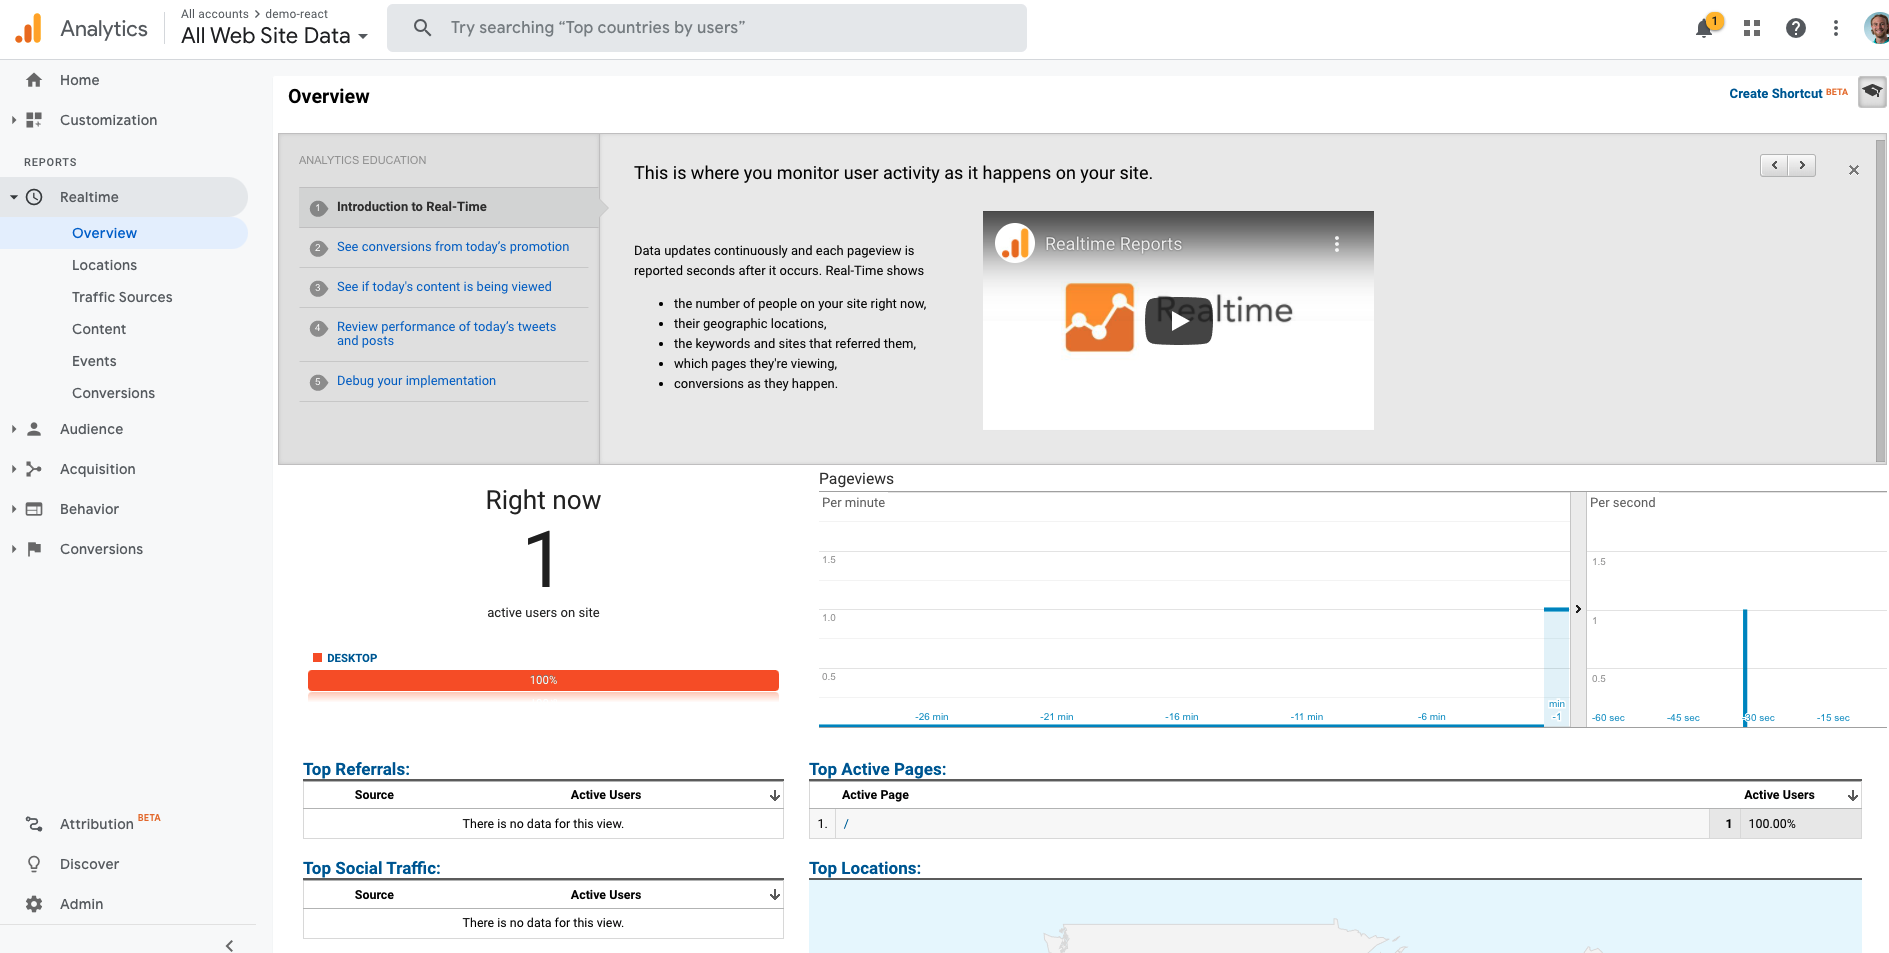
Spin Up Google Analytics
Run npm run start in the root of the application and open the localhost:3000 app. The pageviews should now be tracking in the analytics account you created!
To further enhance our tracking, setting up the User-ID feature in Google Analytics to associate sessions with the clientId.
Creating the Event Listener
The next step is creating a function that captures the click events on the app.
  // This is the click handler on document.body that tracks analytics
  useEffect(() => {
    const handler = async (evt) => {
      const el = evt?.target?.closest("*");
      // See what is being tracked in the closest capture.
      console.log(el)
    };

    document.body.addEventListener("click", handler);

    return () => {
      document.body.removeEventListener("click", handler);
    };
  });
The newly created function, handler is going to be called by the addEventListener, wrapped by a separate useEffect hook in analytics.js.
When executed, the handler should return the closest HTMLElement evt?.target?.closest("*"); to the click event. The click event is being captured by the DOM listener, and removed when the event is completed.
Write a GraphQL Mutation
To enhance the handler function, a graphql mutation can be written and run asynchronously with the click event.
const handler = async (evt) => {
      // The current date / time
      const now = new Date().toLocaleString();

      // Get the nearest element.
      const el = evt?.target?.closest("*");

      // Get the full DOM path by traversing up the tree
      let path = [];
      let ref = el;

      do {
        const tag = ref.tagName.toLowerCase();
        const id = ref.id ? `#${ref.id}` : "";
        let classes = [];
        ref.classList.forEach((c) => classes.push(`.${c}`));

        path = [`${tag}${classes.join("")}${id}`, ...path];
        ref = ref.parentNode;
      } while (ref.parentNode);

      path = path.join(" > ");

      // Create an action object. It's either our specifically marked one,
      // or derived from the event
      const action = {
        path: el.dataset.analyticsData || path,
        type: el.dataset.analyticsAction || evt.type,
      };

      // This is the query we are sending
      const query = `
        mutation MyMutation {
          amplitude_event(
            eventTime: "${now}"
            eventType: "${action.type}"
            path: "${action.path}"
            userId: "${userId}"
          ) {
            code
            events_ingested
            payload_size_bytes
            server_upload_time
          }
        }
      `;

      console.log(query)

      if (REACT_APP_ANALYTICS_STEPZEN_API_URL) {
        await fetch(REACT_APP_ANALYTICS_STEPZEN_API_URL, {
          body: JSON.stringify({ query }),
          headers: {
            Authorization: `Apikey ${REACT_APP_ANALYTICS_STEPZEN_API_KEY}`,
            "Content-Type": "application/json",
          },
          method: "POST",
        }).then((response) => {
          console.log(response);
          response.json().then((data) => {
            console.log("the response", data);
          });
        });
      }
    };
In the fetch request, the GraphQL Mutation takes four arguments.
eventTime: "${now}"
eventType: "${action.type}"
path: "${action.path}"
userId: "${userId}"
const now = new Date().toLocaleString('en-US', { timeZone: 'PST' }); will create a variable associated with time of the click event.
const el = evt?.target?.closest("*"); creates a variable that is looped over in a do{}while{} loop and captures parent HTMLElements of the event action. This loop is reassigned to the variable path.
The path and type are assigned to an object action.
const action = {
    path: el.dataset.analyticsData || path,
    type: el.dataset.analyticsAction || evt.type,
  };
The state variable userId is assigned to clientId. This clientId is being generated by the react-ga dependency.
Capture the Click Event
The userId from google analytics and event listeners of click events are ready to be timestamped and sent in a GraphQL fetch request. Stringify the query, provide the proper headers, and send the data to the generated StepZen endpoint.
Re-run the app if it it is not already running:
npm run start
Now at localhost:3000, the react app should be running. Clicking anywhere in the application will capture the click event. After the click event occurs, a response from the fetch request should appear in our console!

The GraphQL Response
{
  "data": {
    "amplitude_event": {
      "code": 200,
      "events_ingested": 1,
      "payload_size_bytes": 234,
      "server_upload_time": -601656214
    }
  }
}
Amplitude should be tracking one click event by time, path, type, and userId. The clientId being passed from the react-ga tracker is the userId in Amplitude, and should be the same userId being tracked in google analytics.
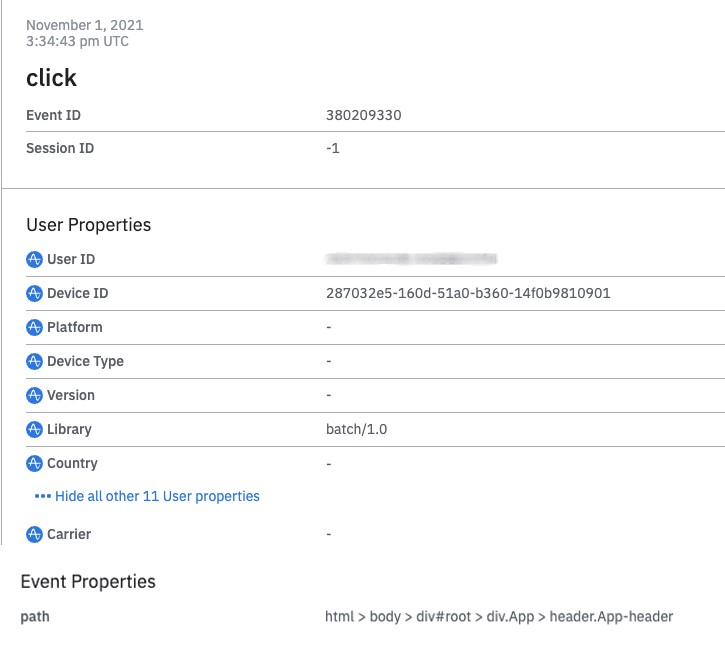
Congrats, you have now successfully captured an event on a single-page react application that is passing to two separate analytics platforms!
Next Steps
To capture DOM events with Event Listeners in alignment with react hooks is valuable for modern application analysis. Once these DOM events are properly sending data logs to third-party analytics platforms, the need to send and modify data logs to multiple locations beyond google analytics and amplitude can be the next challenge for analytics in an application.
As the backend source for data logging, GraphQL and StepZen make POST'ing these API events easily configurable, and more importantly, scalable for any application.
I do plan on showing how StepZen can scale these tracking events in a part 2 series of Event Tracking. Reach out on our Discord if you want me to expedite the series to get your analytics firing on React.
You can sign up for StepZen here to give it a try.