A mutation is a type of operation that can modify server-side data. In GraphQL, mutations must be explicitly specified by including the mutation keyword before the query. For additional information see the GraphQL Mutations topic.
GraphQL mutations have all the same benefits and efficiencies as the queries mentioned in the GraphQL query basics.
Follow the steps below to learn the basics of constructing a mutation in GraphQL. This tutorial connects to both Fauna and SendGrid as examples:
Fauna Example
The Fauna GraphQL API is a serverless web-native GraphQL API, that provides an easily accessible way to explore many of GraphQL's transactional features.
Perform the steps in the following subsections to get set up:
- Set up the Fauna Database
- Create a Database
- Prepare Types, Inputs, and Queries
- Create a Mutation Type
- Create a Store with CREATE_STORE
- Search for a Store with FIND_STORE_BY_ID
- Update the Name of the Store with UPDATE_STORE_NAME
- Delete the Store with DELETE_STORE
Set up the Fauna Database
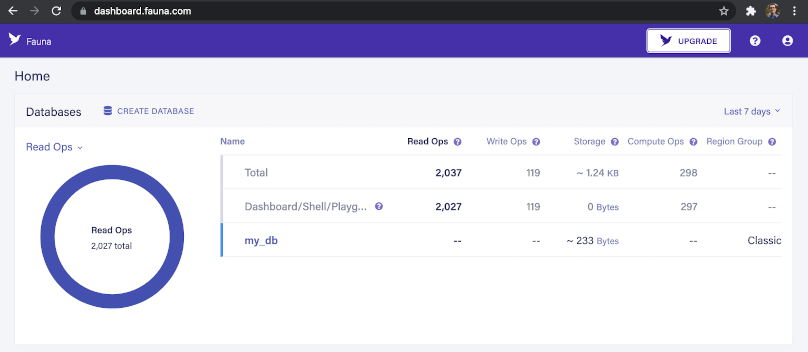
Navigate to Fauna.com and click Sign Up. You will be taken to the Fauna dashboard:
Create a Database
Follow the steps below to create a database:
-
Create a new database in Fauna named
stepzen-fauna. Use the Classic region group and enable the Use demo data option: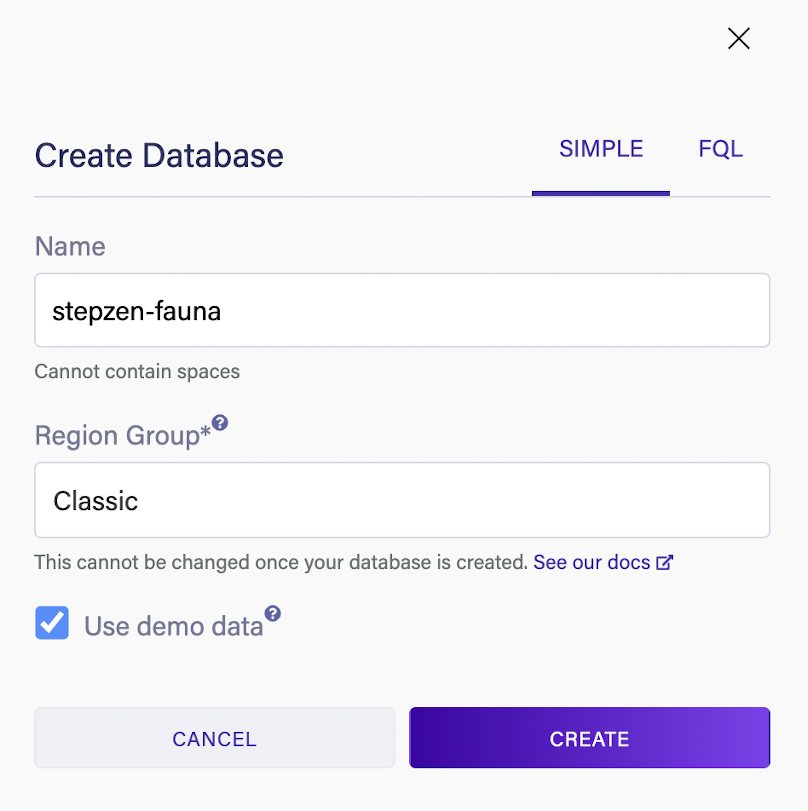
-
Once the database is created, open the GraphQL menu option within the Fauna Dashboard. You'll need the HTTP authorization header at the bottom of the Playground to use in your
config.yamlfile.
-
Create a working directory on your local machine for your StepZen project, and place a
config.yamlfile in the directory with the following contents:configurationset: - configuration: name: fauna_config Authorization: Basic MY_FAUNA_KEYReplace
Basic MY_FAUNA_KEYwith the information you just copied from the GraphQL Playground in the Fauna dashboard.
Next, you will write the GraphQL schema code that builds your API within StepZen.
Prepare Types, Inputs, and Queries
Create a file named fauna.graphql within the local working directory containing your config.yaml file, and add the following code to fauna.graphql:
type Store { _id: ID! name: String! address: Address } type StorePage { data: [Store]! after: String before: String } type Address { street: String city: String state: String zipCode: String } input AddressInput { street: String city: String state: String zipCode: String } input StoreInput { name: String! address: AddressInput } type Query { findStoreByID(id: ID!): Store @graphql( endpoint: "https://graphql.fauna.com/graphql" configuration: "fauna_config" ) allStores: StorePage! @graphql( endpoint: "https://graphql.fauna.com/graphql" configuration: "fauna_config" ) }
types represent the objects you expect to receive in response to the query. For example, Fauna's sample data has a store with an address, and these are represented by the Store and Address types shown above. The properties of each match the data that you'll retrieve when querying these types in the Fauna backend.
inputs are the arguments passed into the mutations to specify what to send to Fauna. For example, StoreInput will be passed to a mutation and contains the name and address properties for a Store to add or update. The Query type contains your queries to retrieve data from the backend:
Create a Mutation Type
Within GraphQL, the Mutation type is specifically designed for any transactions which will modify data. Let's create a type Mutation with the following mutations: createStore, updateStore, and deleteStore:
type Mutation { createStore(data: StoreInput!): Store! updateStore(id: ID!, data: StoreInput!): Store deleteStore(id: ID!): Store }
At this point, the mutations won't do anything since they are not connected to a backend. Let's fix that.
Each mutation will need an endpoint. Since you're connecting with the Fauna backend via its GraphQL API, specify https://graphql.fauna.com/graphql. The configuration refers to the configuration you created earlier within the config.yaml file that you named fauna_config. This passes in the authorization required to work with the Fauna API.
Add these mutations to the end of fauna.graphql:
type Mutation { createStore(data: StoreInput!): Store! @graphql( endpoint: "https://graphql.fauna.com/graphql" configuration: "fauna_config" ) updateStore(id: ID!, data: StoreInput!): Store @graphql( endpoint: "https://graphql.fauna.com/graphql" configuration: "fauna_config" ) deleteStore(id: ID!): Store @graphql( endpoint: "https://graphql.fauna.com/graphql" configuration: "fauna_config" ) }
The last thing you need is to create an index.graphql file within the same working directory, with the following contents that tell StepZen how to assemble the schema:
schema @sdl(files: ["fauna.graphql"]) { query: Query }
Note: You only have one schema file at the moment.
Follow the steps below to upload and deploy this schema to your StepZen account:
-
Ensure you have the StepZen CLI installed and configured. See the documentation for installing and configuring the CLI if you do not already have it installed.
-
Open a command prompt and run
stepzen start.
Create a Store with CREATE_STORE
Now you can test the mutations from the "Explorer" tab in the StepZen dashboard by entering the following mutation:
mutation CREATE_STORE { createStore( data: { name: "Fake Store" address: { street: "123 Fake Street" city: "Washington" state: "DC" zipCode: "12345" } } ) { name _id address { city state street zipCode } } }
The response will contain the store data, including the _id for the store you just inserted:
{ "data": { "createStore": { "_id": "305411426543992901", "address": { "city": "Washington", "state": "DC", "street": "123 Fake Street", "zipCode": "12345" }, "name": "Fake Store" } } }
Search for a Store with FIND_STORE_BY_ID
Use the ID to query the information about the store you just created. Copy the value of _id from the new store and paste it between the quotes in id: "NEW_STORE_ID":
query FIND_STORE_BY_ID { findStoreByID(id: "NEW_STORE_ID") { _id name address { street city state zipCode } } }
Update the Name of the Store with UPDATE_STORE_NAME
Update the store's data in Fauna, by pasting the same store _id value between the quotes in id: "NEW_STORE_ID":
mutation UPDATE_STORE_NAME { updateStore(id: "NEW_STORE_ID", data: { name: "Updated Fake Store" }) { name _id } }
The response will contain the store's updated name and ID.
Delete the Store with DELETE_STORE
Paste the same store _id value between the quotes in id: "NEW_STORE_ID", to delete the store you just created and edited:
mutation DELETE_STORE { deleteStore(id: "NEW_STORE_ID") { _id name } }
The response will contain the deleted store's ID and name.
SendGrid Example
Now that we've covered the basics of how mutations work and how to set them up in StepZen, let's look at another example. The SendGrid Email REST API can be written into a GraphQL schema with mutations using StepZen.
Perform the steps in the following subsections to write the SendGrid Email REST API into a GraphQL schema with mutations using StepZen:
- Set up a SendGrid Account
- Create a SendGrid API Key and Template
- Prepare Types and Queries
- Create a Mutation Type
- Send an Email Using sendTemplatedEmail
Set up a SendGrid Account
Navigate to SendGrid.com and click Start for Free. You will be taken to the SendGrid dashboard.
Create a SendGrid API Key and Template
Follow the steps below to create a SendGrid API key and template:
-
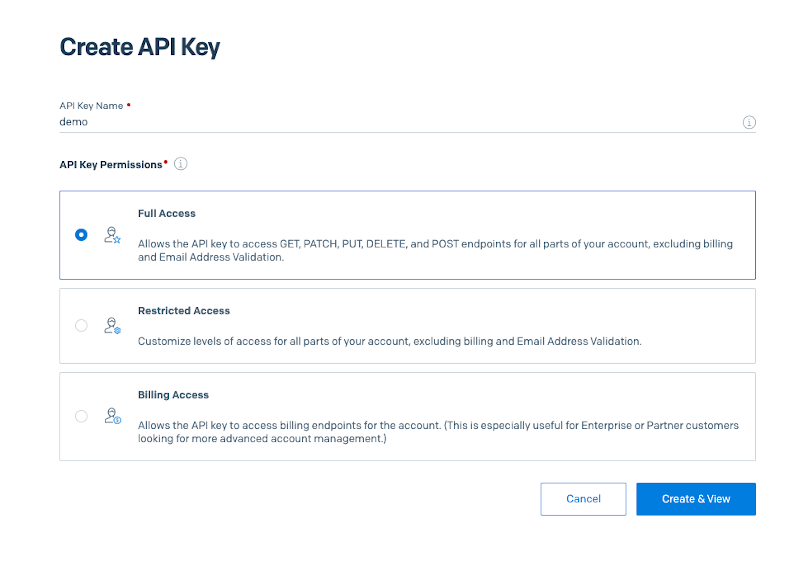
Navigate to Settings > API Keys and select Create API Key:
-
Create a local working directory for your StepZen schema code. Copy the API key and add it to a
config.yamlfile as shown below: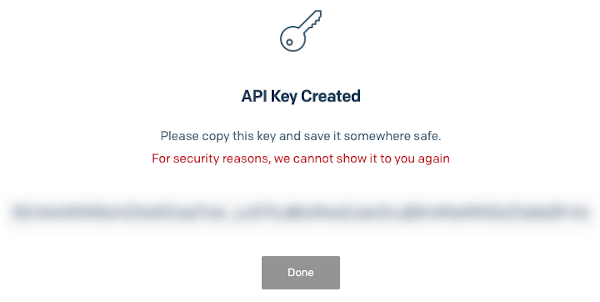
configurationset: - configuration: name: sendgrid_config Authorization: Bearer xxxx -
Navigate to Email API > Dynamic Templates and click Create a Dynamic Template:
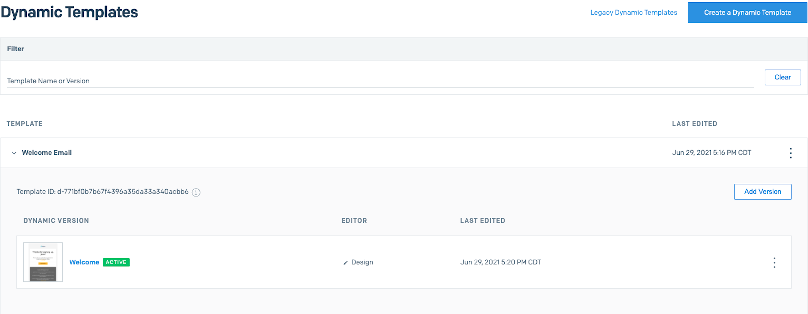
Make note of the ID of the template (see Template ID in the image above). You'll need this later.
Prepare Types and Queries
Follow the steps below to prepare types and queries:
-
Create a
sendgrid.graphqlfile in your working directory. Within that file, define the types and queries to interact with via the SendGrid API:type Email @mock { message: String } type Template { id: String! name: String! generation: String updated_at: String } type Query { template(id: ID!): Template @rest( endpoint: "https://api.sendgrid.com/v3/templates/$id" configuration: "sendgrid_config" ) }Note: The
@mockdirective on theEmailtype returns mock data. The SendGrid API does not return any body in the response when using it to send an email. GraphQL mutations always include some sort of response. You've added mock data so that the response doesn't come back asnull. -
Create an
index.graphqlfile in the working directory with the following contents:schema @sdl(files: ["sendgrid.graphql"]) { query: Query } -
Run
stepzen startand add the unique ID from the template you created in SendGrid to the following query:query MyQuery { template(id: "d-771bf0b7b67f4396a35da33a340acbb6") { generation id name updated_at } }You should get a response similar to the following, indicating that the SendGrid API successfully queried the template:
{ "data": { "template": { "generation": "dynamic", "id": "d-771bf0b7b67f4396a35da33a340acbb6", "name": "Welcome Email", "updated_at": "2021-06-29 22:16:21" } } }
Create a Mutation Type
Next, add a mutation to send an email via SendGrid's API:
type Mutation { sendTemplatedEmail(to: String!, from: String!, template_id: String!): Email }
The mutation performs a POST to https://api.sendgrid.com/v3/mail/send. You need to send the body through the postbody field that follows the template email example in the SendGrid docs. The configuration is set to the sendgrid_config that was defined in your config.yaml file to securely send the API key.
The postbody URL-encodes the three arguments: to, from, and template_id into the fields expected by the REST API, by using a \"{{.Get \"from\"}}\" structure to properly add the quotes around the values:
type Mutation { sendTemplatedEmail(to: String!, from: String!, template_id: String!): Email @rest( method: POST endpoint: "https://api.sendgrid.com/v3/mail/send" postbody: "{\"personalizations\": [{\"to\": [{\"email\": \"{{.Get \"to\"}}\"}]}],\"from\": {\"email\": \"{{.Get \"from\"}}\"},\"subject\":\"demo\",\"content\": [{\"type\": \"text/html\",\"value\": \"Heya!\"}], \"template_id\" : \"{{.Get \"template_id\"}}\"}" configuration: "sendgrid_config" ) }
Send an Email Using sendTemplatedEmail
Now that the mutation is written, test it within the GraphiQL editor:
mutation MyMutation { sendTemplatedEmail( from: "example@stepzen.com" template_id: "d-6d5704f9a5c9424d9c67a226c8fa2b43" to: "example@stepzen.com" ) { message } }
As noted earlier, you can see in the response below that SendGrid does not return send a success message, so for now you're just returning mock data. If you want to set up response data, you'll need to set up a webhook on SendGrid.
{ "data": { "sendTemplatedEmail": { "message": "Vestibulum lacinia arcu eget nulla" } } }
Even though the response contains mock data, you will still see the email in the recipient's inbox, that was sent via the to field in the mutation.

For More Information
For more information see: