Turn a WordPress Blog into a Mobile App Using StepZen and React Native

 David Griffin
In this post, I share how I turned a WordPress blog with Cloudinary assets into a mobile app using StepZen and React Native. I started this project because I wanted to help a non-profit put their WordPress.com blog onto a mobile application. This application would update when the blog did, acting as a PR channel for the organization. This would achieve the goal of making an incredibly cheap and easy way for them to reach better market saturation.
Getting set up
Using StepZen and React Native with Expo makes this process easy. I started with the react-native-stepzen repo on the StepZen GitHub page. As the readme instructed, I installed Expo globally first.
npm install -g expo-cli
After cloning the above repo, I installed dependencies by running
npm install
Next, I opened the root folder of the clone with my favorite IDE VSCode:
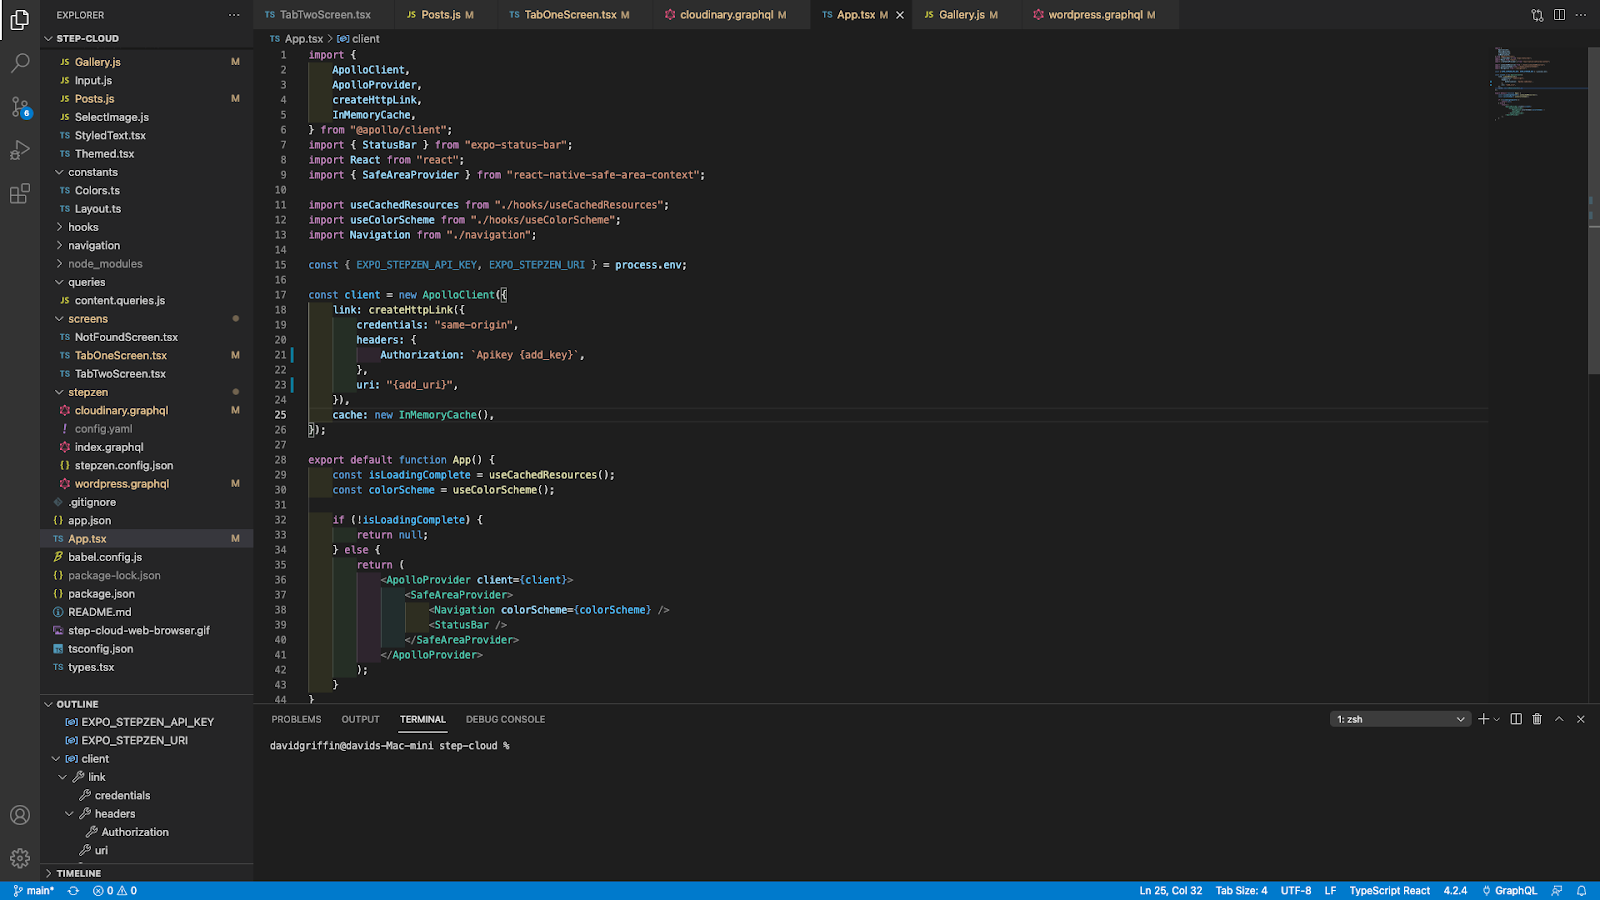
And added my StepZen credentials to App.tsx file in the main folder.
const client = new ApolloClient({
  link: createHttpLink({
    credentials: 'same-origin',
    headers: {
      Authorization: `Apikey {add_key}`,
    },
    uri: '{add_uri}',
  }),
  cache: new InMemoryCache(),
})
When you are logged in to your StepZen account, your Apikey is available on your dashboard page. The URI for the GraphQL endpoint is given to you by StepZen when you deploy your schema. Mine is:
uri: "https://HeadyFlamingoMouth.stepzen.net/api/native/__graphql",
Review the StepZen docs for tutorials on how to make your own endpoint.
Why am I injecting the Apikey and endpoint directly into app.tsx and not using environment variables?
The reason we are injecting the authorization key directly into the app.tsx is because using environment variables in react-native is not secure, so we avoided it to remove any confusion. React Native apps are entirely client-side, and require an “orchestration layer between your app and the resource”. Read more on storing sensitive information here.
When you publish the app to the web, such as GitHub, remember to remove your keys from app.tsx. If you would like to orchestrate a layer between your app and StepZen, reach out to the StepZen team on their Discord.
Next, I went into the folder named StepZen and added a config.yaml file. This is the file with all your Cloudinary and WordPress API keys, names, etc. and follows the format:
configurationset:
  - configuration:
      name: cloudinary_mutation
      api_key: <your cloudinary api key>
      api_secret: <your cloudinary api secret here>
      cloud_name: <your cloudinary name here>
As the data that I am getting from WordPress is public there is no need for configuration, but this is where it would go if you did need configuration. The Cloudinary configurations can be found in the Cloudinary dashboard.
Starting the app and running queries
Next, it was time to start the app for the first time to make sure the authorizations were correct and do a few sample queries. In your terminal, run these commands in your apps root directory.
npm install -g stepzen-cli
cd stepzen
stepzen start
A nifty StepZen IDE is created— an embedded GraphiQL in the StepZen dashboard. This is effectively the backend of the project.
I used this IDE to run sample queries before hooking up the React-native frontend. Once I confirmed I could get data from calling all WordPress posts and calling all Cloudinary images, I had complete confidence in the backend and began implementing the React Native frontend.
Now leave the browser and return to your terminal where you ran stepzen start. In that terminal, you should see your StepZen endpoint is running with the details of where your endpoint currently exists. If the endpoint did not successfully spin up, reach out to the StepZen team.
The CLI returns the true endpoint where the data can be retrieved with your apikey, which looks something like https://HeadyFlamingoMouth.stepzen.net/api/native/__graphql. Copy this generated endpoint with your unique account name and inject it into your App.tsx that we mentioned earlier. Add the Apikey as well if you have not already done so.
const client = new ApolloClient({
   link: createHttpLink({
       credentials: "same-origin",
       headers: {
           Authorization: `Apikey {add_key}`,
       },
       uri: "https://youruniqueaccount.stepzen.net/api/native/__graphql",
   }),
   cache: new InMemoryCache(),
});
Implementing the React Native frontend
The StepZen React Native template came with a nice built-in two-tab navigation implementation which was perfect so I kept it.
🐒➔ tree
.
├── app.tsx
└── screens
    ├── NotFoundScreen.tsx
    ├── TabOneScreen.tsx
    └── TabTwoScreen.tsx

1 directories, 4 files
I decided to use TabOneScreen.tsx as the home/blog posts page and TabTwoScreen.tsx as the Cloudinary-only gallery with the option to add on some administrative functionality in the future, like taking/adding an image to your Cloudinary account from your phone or making a post to your WordPress blog from your phone.
I started with TabTwoScreen.tsx and set up my gallery. So I needed to clean out the template boilerplate and construct my code. I then imported my query dependencies:
import { useQuery } from "@apollo/client";
import {GET_IMAGES} from "../queries/content.queries.js";
And then just inside the TabTwoScreen function, I made the Cloudinary images call to the StepZen server:
export default function TabTwoScreen() {

 const {
   data,
   loading,
   error
 } = useQuery(GET_IMAGES);
 const pics = data?.cloudinaryImages;
 const files = {pics};

 if (loading) return <Text>Almost there...</Text>
 if (error) return <Text>{error?.message}</Text>
This call returns the data and also loading and errors, if any. You can make the loading screen as intricate as you would like. I kept it simple for demonstration purposes. The returned data is of the following form.
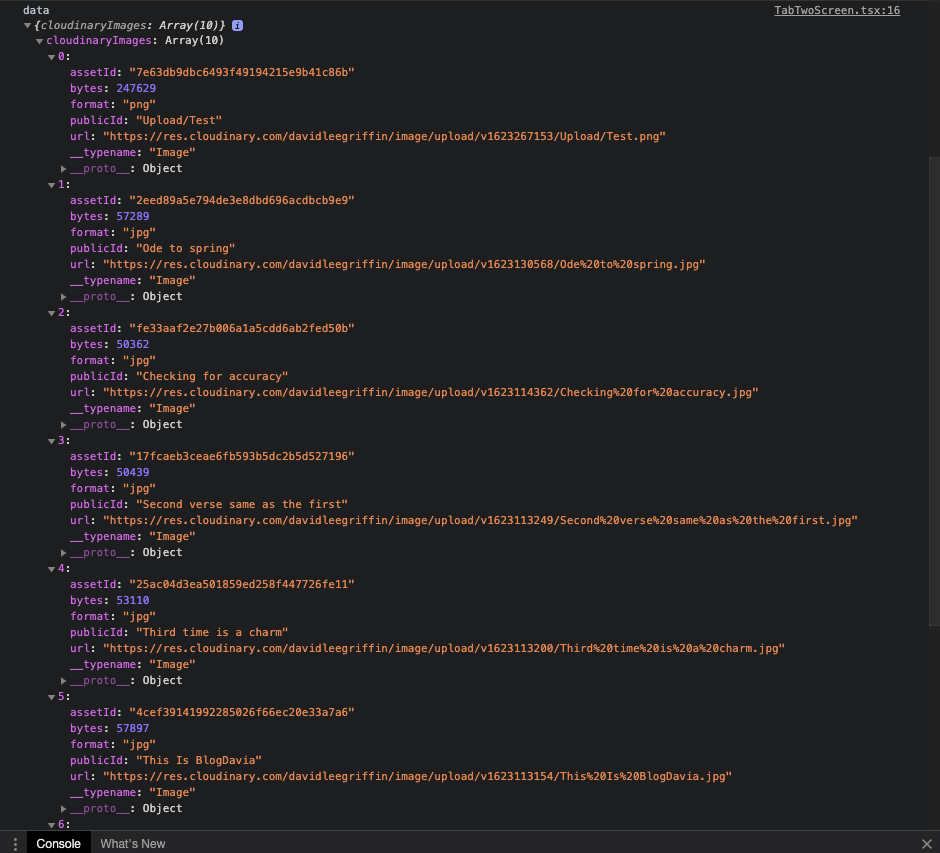
And so I converted the data to a const pics = data?.cloudinaryImages variable constant, but only if there is data returned and then shuffled pics into an object called files, const files = {pics}. This was for future expandability, and in case I wanted to make multiple calls to different endpoints and pass them as one prop into the children.
I then wanted to return this data to a child component to render the images. I called this component Gallery, for lack of imagination, and set it in a ScrollView for ease of navigation through the images.
return (
<ScrollView contentContainerStyle="{styles.contentContainer}">
  <Text style="{styles.title}">Gallery</Text>
  <Gallery props="{files}" />
</ScrollView>
);
And then, in the components folder, I created Gallery.js, which is relatively straightforward. Pass the props in the function call, destructure the pics object from props, map the object and display the images in a ScrollView.
import React from 'react'
import { StyleSheet, Image, ScrollView } from 'react-native'

function Gallery({ props }) {
  const { pics } = props

  return (
    <>
      <ScrollView contentContainerStyle={styles.contentContainer}>
        {Object.values(pics).map((pic, index) => {
          return (
            <Image
              style={styles.image}
              source={{ uri: `${pic.url}` }}
              key={index}
            ></Image>
          )
        })}
      </ScrollView>
    </>
  )
}
And of course, I had to import Gallery into tab-two:
import Gallery from '../components/Gallery'
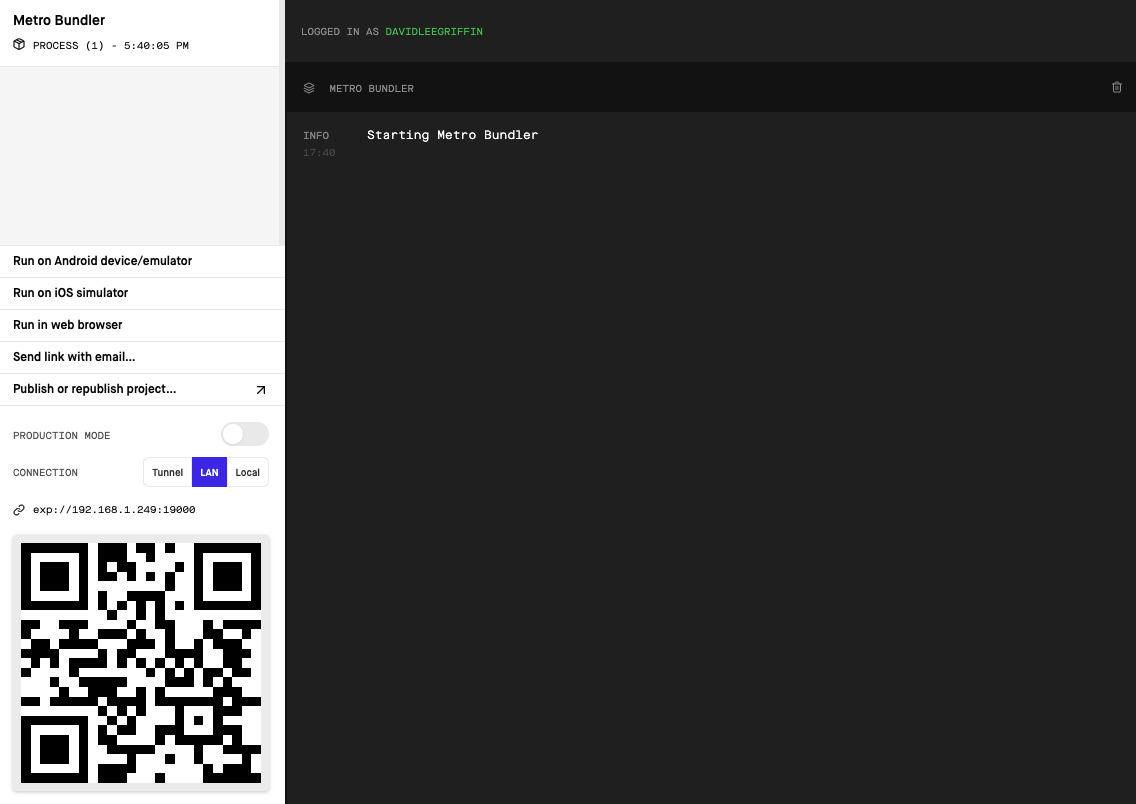
Moment of truth, I opened a terminal from the root directory and executed:
npm start
Which opens the expo screen on your browser:
For testing, I mostly used the Run in web Browser option, and it went well. The Gallery looks something like this:
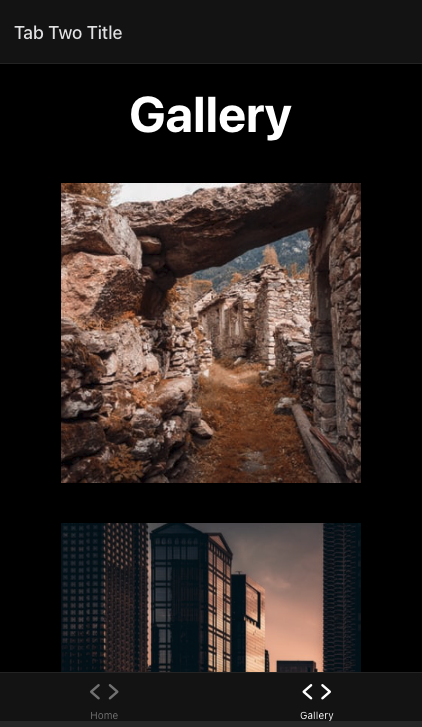
So far, so good!
Rendering the blog posts object
Once TabTwoScreen.tsx and the Gallery component were functioning, it was time for TabOneScreen.tsx, which was only slightly more complex.
After clearing the intro boilerplate out of TabOneScreen.tsx, I again imported dependencies needed to run the GET_POSTS query of blog posts:
import { useQuery } from '@apollo/client'
import { GET_POSTS } from '../queries/content.queries.js'
Then I called the getPosts query just inside the TabOneScreen function just as in the Gallery before:
const { data, loading, error } = useQuery(GET_POSTS)

const blogPosts = data?.wordpressPosts
// console.log('tab1 posts', blogPosts);

if (loading) return <Text>Almost there...</Text>
if (error) return <Text>{error?.message}</Text>
I rendered the blogPosts object a bit differently than in the Gallery referenced previously. In this case, I mapped the blogPosts object and sent the individual post into a Posts component with props={post} so that in the component, we can assign each post an image from my projects Cloudinary account (discussed below), and the code looks like this:
return (
    <>
        <ScrollView contentContainerStyle={styles.contentContainer}>
        <Text style={styles.title}>Home</Text>
        {Object.values(blogPosts).map((post, idx) => {
            return (
                    <Posts
                    props={post}
                    key={idx}
                    />

            )}
            )}
        </ScrollView>
    </>
);
I then created the Posts.js file in the components folder like the Gallery. In the Posts component, I imported the dependencies necessary to call getImageByPublicId.
import { useQuery } from '@apollo/client'
import { GET_IMAGE } from '../queries/content.queries.js'
And then I called it just inside the function Posts({props}), but since it is for a single resource, we called it and passed in the images publicId.
And this is where I got clever and decided the easiest way to match up posts with an image was to name the Cloudinary image the same as the blog post’s title. So that props.title is the variable passed to the image query and returns the selected image.
If there is no image with the publicId of the post title, it returns a random picture. (You could also set it to a default image.)
function Posts({props}) {

   const {
       data,
       loading,
       error
     } = useQuery(GET_IMAGE,
                  {variables: {publicId:`${encodeURIComponent(props.title)}`}}
                  );

     if (loading) return <Text>Almost there...</Text>
     if (error) return <Text>{error?.message}</Text>

   let pic = "";
   if(data?.cloudinaryImage.url) {
       pic = data?.cloudinaryImage.url;
      };
      } else {
       pic="https://picsum.photos/200/300"
   };
Finally, I rendered the title and selected image in a regular View component. As props.content is in HTML with tags I had to use a WebView.
This is desirable because your WordPress blog content lets you embed all kinds of elements that are preset (like YouTube, and Spotify, or specific images you wish to marry to the post) and link to a call-to-action site, like an e-commerce platform or donation screen.
return (
  <>
      <View style={styles.container}>
          <Text style={styles.header}>{props.title}</Text>
          <Image
              style={styles.image}
              source={{uri: `${pic}`}}
              >
          </Image>
      </View>
      <WebView
          style={styles.content}
          originWhitelist={['*']}
          source={{html: `<h1 style="font-size:65px">${props.content}</h1>`}}
      />
  </>
)
That's a wrap!
And that’s it! The app is ready for final testing and deployment to the App stores!
Creating a GraphQL API on top of multiple systems allowed the non-profit to re-use those systems in a new application on a new platform. But if that API had required a lot of development effort and time, it might not have been something they were willing to do. Using a configuration-driven approach allowed me to deliver a solution quickly and cheaply.
I would like to give a big shout-out to Sam Hill from StepZen and the entire StepZen team, who were so helpful and just a joy to work with to hash out all the little details of a project like this. You guys are the best!